RailsNotes UI Starter Kit
[Introduction] Template Overview
Last updated: 27th March, 2025
Welcome to the RailsNotes UI Ruby on Rails starter kit!
Just want to jump in and get started? Jump to the Quickstart section.
I built this template to help you launch your next app, SaaS or side project faster. At this point, I've spent hundreds of hours refining this template, writing these docs and filming video tutorials. You get to skip all that, and build something awesome!
With this template, you can skip building:
- Payments — integrations with Stripe and Paddle to create subscriptions, track billing history, handle multiple plans etc.,
- Authentication — login and password resets with Devise, plus OAuth login with Google and GitHub, and docs for adding other OAuth providers,
- Background Jobs — Sidekiq configured for background jobs, including the web dashboard mounted with password protection,
- Deployment — files and docs for deploying to Render, Hatchbox and Heroku,
- Tests — integration tests with either RSpec or Minitest, for the core functionality of your app
I've deliberately kept this template simple (despite what the length of these docs may suggest). I haven't added a million gems, or features you might not use. Instead, this template does a few core things really well, so you can start building your next app, SaaS or side-project quickly, rather than learning the ins and outs of this template!
This template is currently at v1.2 and supports:
rubyversion:3.4.2,railsversion:8.0.2,- Database:
postgresql, - Web server: Puma
- Job Queue: Sidekiq 8,
- CSS Framework: TailwindCSS v4
Of course, you can swap things out (it's your template!). But these are the boring, sensible defaults that this template officially supports.
Note: If you swap out the defaults from above (maybe swapping PostgreSQL for SQLite), you're on your own with bugs and weird edge cases. You might also find it harder to merge in updates I release to this template in the future.
Unless you have a very solid reason to swap something out, I recommend you stick with the defaults above — they're all very solid, stable pieces of tech and are likely to be around for many years to come (some have been around for decades already!).
Focus on building something awesome, not the tech stack!
The documentation for this Ruby on Rails template is huge and will show you everything you need to know about this template.
If something isn't clear, email me at [email protected]. You can also raise issues or bugs in the RailsNotes UI Starter Kit GitHub Repository.
Included Gems
Since this template is about being simple and lightweight, I've kept the included set of gems tiny!
The extra gems in this template are —
annotaterbfor model annotations (GitHub)letter_openerfor testing emails (GitHub)redisandsidekiqfor background jobs (Sidekiq GitHub)pay,stripeandpaddlefor payments using Pay (Pay GitHub)devise,omniauth-google-oauth2,omniauth-githubandomniauth-rails_csrf_protectionfor authentication and social login (Devise GitHub)
Additionally, the Starter Kit+ template includes the view_component gem for RailsNotes UI email template integration (ViewComponent GitHub)
List of changes
Inside this template, I've added comments that start with —
# [RailsNotes UI Addition]
I've added these comments wherever I've added or tweaked something. To explore all the changes in this template, just do a project-wide search for [RailsNotes UI Addition] (usually ⌘+shift+f / ctrl+shift+f), and all the changes will be there.
This is a handy way to explore the code, and also to double-check that you haven't missed any configuration.
[Setup] Getting Started
Prerequisites
- Ruby installed (version:
3.4.2) - Rails installed (version:
8.0.2) redisinstalled (for job queue, see Installing Redis, RailsNotes)- PostgreSQL installed (for database, see Installing PostgreSQL, DigitalOcean)
Quickstart (I'm feeling lucky)
Setup the template —
# 1. Clone the template, setup a new remote, and run bundle
git clone [email protected]:harrison-broadbent/railsnotesui_starter_kit.git MY_APP_NAME

# 2. Run the setup script
# runs bundle + rails db:prepare, renames your app, and sets git remotes.
cd MY_APP_NAME && rails app:setup

# 3. Run the template
bin/dev
After running bin/dev, visit localhost:3000 to see the splash screen! You can click around, but the template will throw errors due to missing credentials.
You'll fill in the correct credentials as you setup this template, but you should copy the example credentials from config/credentials/EXAMPLE.yml into each environment to start with —
# Copy config/credentials/EXAMPLE.yml into each environment:
bin/credentials:edit --environment=development
bin/credentials:edit --environment=test
bin/credentials:edit --environment=production
Now you can click around without errors (but the login and payments flows won't work, since the example credentials are invalid).
There's more information on setting up the example credentials at Step 3: Setting up Rails Credentials.
With the example credentials set, you can also run the test suite —
rspec       # if using rspec
rails test  # if using minitest
It's worth skimming the detailed setup guide below, then moving on to setup your OAuth providers and setup payments.
Detailed setup guide
Step 1: Cloning the GitHub repository
Note: This section has instructions for the regular
Starter Kittemplate. If you're using theStarter Kit+template, make sure you clone theStarter Kit+repo instead.
Run this command to clone the Starter Kit repository into a folder called MY_APP_NAME:
git clone [email protected]:harrison-broadbent/railsnotesui_starter_kit.git MY_APP_NAME
For example, to call your project my-saas —
git clone [email protected]:harrison-broadbent/railsnotesui_starter_kit.git my-saas
Cloning into 'my-saas'...
...
Once you've cloned the repo, cd into its directory and run rails app:setup to launch the setup script —
my-saas/ $> rails app:setup
The app:setup script does the following:
- Renames your app (renaming a few classes/strings in the Ruby on Rails template),
- Sets correct
gitremotes (renaming the template remote torailsnotesuiand prompting you for a neworiginremote), - Prompts you to choose a test framework (reminding you to choose
MinitestorRSpecand delete the other), - Runs
bundle install(install packages), - Runs
rails db:prepare(setup database)
On setting the correct
gitremotes:Cloning a repository keeps a reference to its GitHub repo. Renaming the template remote to
railsnotesuiand then adding your ownoriginmakes sure that commands likegit pullandgit push,gitreference your own repository. Keeping therailsnotesuiremote (rather than just deleting it) lets you pull in updates.
The railsnotesui remote lets you easily merge in updates to the template — see the Pulling in updates section for instructions.
Step 2: Running your app!
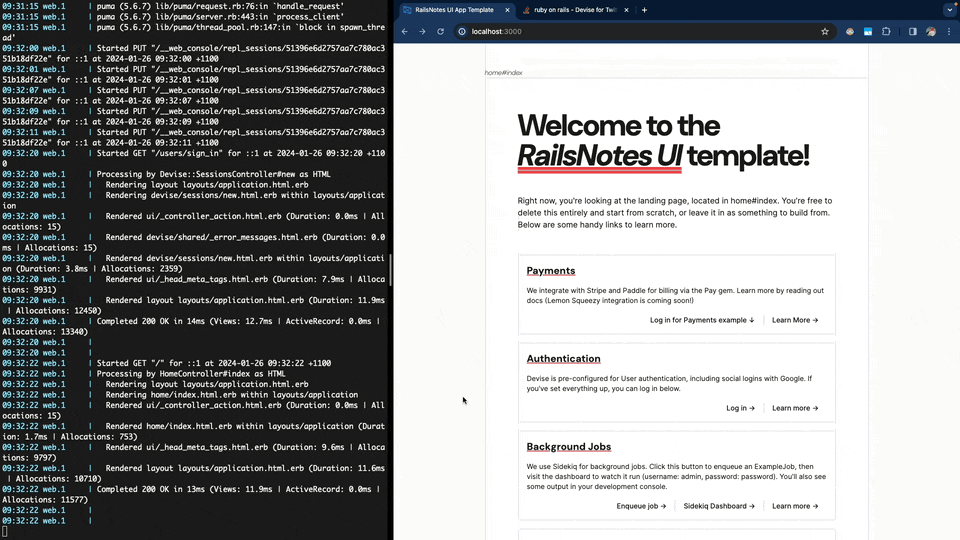
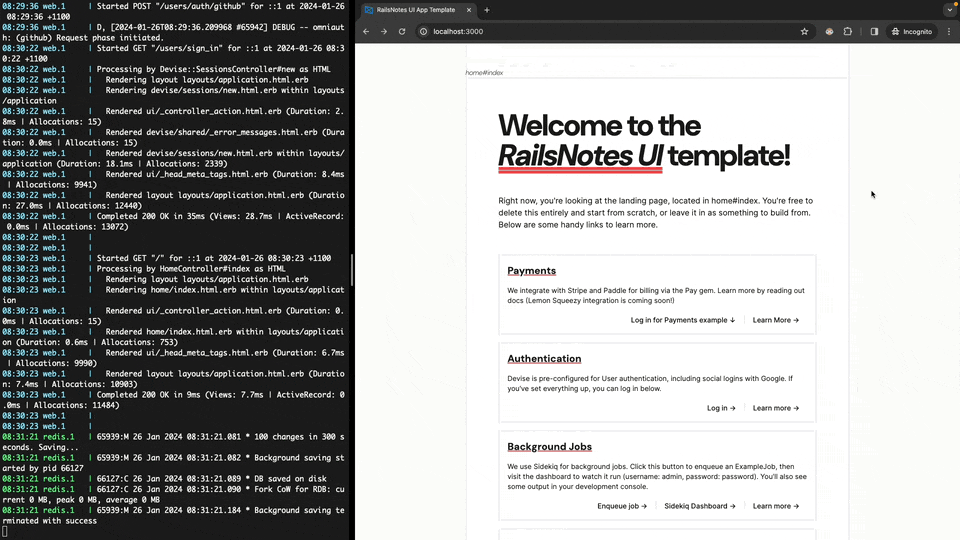
After running rails app:setup, run bin/dev to start your app and see the splash screen —

bin/dev script, then visit localhost:3000 for the splash screen.If you click around, you'll get some errors — it's because the app is missing some credentials, which we add in the next section.
The
bin/devscript lets you define several processes to run in theProcfile.devfile, then run them all at once. This is extremely handy in development, and will shine when you setup a payments processor.I've written an in-depth about the Procfile.dev file and bin/dev script.
Step 3: Setting up Rails Credentials
This template uses Rails Credentials to manage application secrets. You can run the template locally without any credentials, but you'll get errors if you click around or try to run the test suite.
To run the app locally without any errors, you should copy the example credentials into each Rails environment (development, test and production).
The example credentials are inside config/credentials/EXAMPLE.yml —
oauth:
  google_oauth2:
    client_id: aaaa.apps.googleusercontent.com
    client_secret: aaa-bbbb-cccc-dddd
  github:
    client_id: aaa.bbbbb
    client_secret: aaaa
stripe:
  private_key: sk_test_aaaa
  public_key: pk_test_aaaa
  signing_secret:
    - whsec_aaaa
paddle_billing:
  client_token: test_aaaa
  api_key: aaaa
  signing_secret: pdl_ntfset_aaaa/bbbb
  environment: sandbox
You'll replace these credentials as you work through this document; You can remove secrets for things you don't need, and add secrets for things you do.
For example, if you decide to use
stripefor payments, you can remove thepaddle_billingcredentials.
Run the following commands to copy the example credentials to the development, test and production environments (copy and paste EXAMPLE.yml) —
#1. Development environment
bin/credentials:edit --environment=development

#2. Test environment
bin/credentials:edit --environment=test

#3. Production environment
bin/credentials:edit --environment=production
I've included a
bin/credentials:editscript to use in place ofrails credentials:edit. The script makes it easier to use a different editor to edit your credentials (it uses VS Code by default).
That's all for credentials! You'll edit these files as you set up your OAuth providers and payment processor.
Step 4: Continue setup
Now that the template is installed and running, continue setting up the template in the following sections (in any order):
- Setup Devise and OAuth for logins
- Setup Payments with Stripe or Paddle
- Setup Sidekiq for background jobs
- Setup the test suite with RSpec or Minitest
- Deploy the app
[Auth] Authentication with Devise
This template uses Devise for authentication — it's the go-to for Ruby on Rails apps and includes everything you need. In this template, it's setup for username + password login, password resets, and social (OAuth) logins with Google and Github.
It's worth reading through the Devise getting started guide yourself. Learning a bit about Devise, and how to work with it (if you're new to it) will make your life a lot easier. If you've worked with Devise before, you'll be relieved to read that this template uses a boring, straightforward integration with the User model.
A lot of the core login functionality is already setup, like username and password login and password resets. The only things left to configure are OAuth providers for social logins (or you can rip them out OAuth if you don't want to use it).
This section will walk you through:
Setting up Google OAuth
Docs (not from Google): Registering your app with Google (johnofsydney.github.io).
To setup Google as an OAuth provider, you create a new OAuth app in the Google Cloud Console (don't worry if you've never used it), then copy the credentials over.
The steps to configure Google for OAuth login —
- Start by creating a new Google Cloud app and enabling the "People API". Enable that API by visiting this Google Cloud Console URL — if you've never used the Google Cloud Console before, you'll see a screen that says "To view this page, select a project. Create Project."
- Create a new project with a descriptive name (it's just an internal name).
- You'll be redirected to a screen called "Enable access to API". Click "next", then "enable", to switch on the "People API". This API will let us use Google as an OAuth provider in our app.
- Next, use the left-hand sidebar to visit "APIs & Services > OAuth consent screen". You need to configure a consent screen before generating your credentials. This is the screen your users will see when they try to login with Google.
- You'll be prompted to configure your consent screen. Create an "External" consent screen, and fill out your details on the next page. There are only a couple of required fields — the rest you can come back to later (or do now, up to you). Save everything, then you can skip through the next couple of pages to finish creating your consent screen.
Note: OAuth consent screens start in "Testing" mode. At some stage, you'll need to return to your consent screen and click "Publish App" to make this consent screen live and usable for unlimited logins. I recommend you do this now while you're in your Google Cloud Console (just go back to the "APIs & Services > OAuth consent screen" page and you'll see the "Publish App" button).
- Next, use the left-hand sidebar to visit "APIs & Services > Credentials". Click the "+ Create Credentials" button (towards the top), and choose "OAuth client ID".
- For "Application type" select "Web application" and give it a name. In the section marked "Authorized redirect URIs", we need to add our callback URLs for this OAuth flow. For local development, add these two URLs:
http://localhost:3000/users/auth/google_oauth2/callbackhttps://localhost:3000/users/auth/google_oauth2/callback- Once you publish your app to production, you'll need to add your production URL to this section too. Your production redirect URL will look something like this:
https://YOUR_SITE.com/users/auth/google_oauth2/callback
- Once you're done, save that page and you'll be shown your "Client ID" and "Client secret". Take note of these (you can return to these values by editing the OAuth client).
- Finally, run
bin/credentials:edit -e development, and copy across your credentials:
oauth:
  google_oauth2:
    client_id: 1048130414603-...apps.googleusercontent.com
    client_secret: GOCSPX-...-Hk_67sxrZX-ATE0
You should also copy these credentials to your production credentials by running bin/credentials:edit -e production, and your test environment with bin/credentials:edit -e test. You can use the same client_id and client_secret for all 3 environments.
That's it! Setting Google OAuth up is an ordeal, but you've only got to do it once. If you go back to your app running locally, you should now be able to login with Google!
Note: Don't forget to publish your OAuth consent screen, since it starts in a limited "testing" mode by default.
Setting up GitHub OAuth
GitHub docs: Registering a GitHub App
Adding GitHub as an OAuth provider is easy. You can follow the instructions below, or read the GitHub App docs.
Note: I'm going to show you how to setup GitHub as an OAuth provider by creating a "GitHub App". GitHub also provides standalone OAuth apps, but they recommend GitHub apps instead (both can be used for setting up OAuth login).
To configure GitHub for OAuth login —
- Visit your GitHub developer settings page. Click on "GitHub Apps" in the left-hand sidebar.
- Create a new GitHub app by clicking "New GitHub App".
- Fill out the details for your new GitHub app. Some important fields are:
- GitHub App Name: The name your users will see when they're redirected to GitHub to login.
- Homepage URL: The homepage of your app. You can set this to a placeholder while you're developing (ie:
https://example.com). - [!] Callback URL: The callback URL GitHub will hit after authenticating a user. You should set these to the following for development, and come back here and add your production URL after deploying your app —
http://localhost:3000/users/auth/github/callbackhttps://localhost:3000/users/auth/github/callback- Once you've deployed your app, you'll want to come back here and add your production URL to the list of callback URLs, like:
https://YOUR_SITE.com/users/auth/github/callback
- Expire user authorization tokens: This is optional. It's enabled by default since it's more secure, but your users will occasionally get logged out when their tokens expire. If you disable this, their tokens will never expire (never logged out, but worse for security). I usually leave this ticked.
- Request user authorization (OAuth) during installation: You should enable this so that, as part of the OAuth flow, users grant the correct scopes to allow them to login to your app.
- Click "Save Changes" to save your information.
- Note down the "Client ID" in the "About" section at the top of the page. It will look like
Iv1.e6850...... - Create a new secret key by clicking "Generate a new client secret" in the "Client secrets" section of the page. Note down the client secret, which will look something like
d33138fed0bc..... - Finally, open your application credentials by running
bin/credentials:edit -e development, and copy the "Client ID" and "Client secret" into thegithubkeys, like so —
oauth:
  google_oauth2: ...
  github:
    client_id: Iv1.e6850.....
    client_secret: d33138fed0bc.....
Note: make sure to copy these credentials into your production secrets by running
bin/credentials:edit -e production. You can use the same secrets, just remember to add a new callback URL for your production app! You should also copy these credentials to your test environment withbin/credentials:edit -e test.
That's it! You should now be able to login with GitHub!
Adding a new OAuth provider
Adding a new OAuth provider to your app is relatively straightforward.
To start, you should read the Devise OmniAuth Overview. It contains the information you'll need to hook up a new provider, but I'll give you a brief rundown here:
- Pick an OAuth strategy to use. This is the provider you want your users to be able to login with (ie: Facebook, Heorku, Notion etc). You should look through the community-maintained list of OAuth strategies to find your provider.
- Once you've found your provider, you need to add their
omniauthgem to theGemfileof your Rails app. You can do this withbundle install omniauth-{provider_name}(ie:bundle install omniauth-heroku), or by adding it to yourGemfiledirectly. Some omniauth providers will give you the command to run in theirREADMEfiles. Others won't, and you'll have to guess at the correct gem name (it's almost alwaysomniauth-{provider_name}) - Generate a
client_idandclient_secretfor your provider (how you do that is different for each provider), and add those keys to a new section in your credentials by runningbin/credentials:edit -e development(don't forget to add them totestandproductiontoo). The structure in your credentials file should be like this:
   oauth:
     google_oauth2: ...
     github: ...
     provider_name:
       client_id: provider_client_id...
       client_secret: provider_client_secret...
- Initialize your new provider in
config/initializers/devise.rbin theOmniAuthsection, under the existing providers, and using theconfigure_omniauthhelper like this:
configure_omniauth(config, :provider_name, scopes: "scopes.from.your.provider")
- Add your new provider to the array of
omniauth_providersin yourUsermodel (app/models/user.rb):
omniauth_providers: %i[google_oauth2 github your_provider]
- Add a new method to handle OAuth callbacks for your provider inside
Users::OmniauthCallbacksController(app/controllers/users/omniauth_callbacks_controller.rb):
   def your_provider
     login_or_create_oauth_user_for(:your_provider)
   end
You also need to add your provider into the private omniauth_provider_name method in the same file:
   def omniauth_provider_name(provider)
       return "Google" if provider == :google_oauth2
       return "Github" if provider == :github
       return "Your Provider" if provider == :your_provider
   end
- Finally, add a button into your views to redirect a user to sign in with your new OAuth provider:
   # app/views/devise/registrations/new.html.erb

   <% if resource_class.omniauth_providers.include?(:your_provider) %>
     <%= button_to omniauth_authorize_path(resource_name, :your_provider), method: :post, data: { turbo: false } do %>
         Log in with Your Provider
     <% end %>
   <% end %>
That's it! If you've set up everything correctly, you should be able to login with your new OAuth provider!
If you're having trouble, double-check these 3 things (they always trip me up) —
- Have you added the correct
client_idandclient_secretto your credentials file (ie:bin/credentials:edit -e development)? - Are you using the correct provider name throughout your code (ie:
:google_oauth2,:heroku,:facebooketc)? - Are you passing the correct scopes to
configure_omniauth(config/initializers/devise.rb)? These are different for each provider, so you'll need to check your provider's docs for what to pass.
Configure your default mail sender
Since Devise sends emails (ie: password reset emails), you should configure the default mail sender address, for both Devise and ActionMailer. Just change it in the following places —
- In
config/initializers/devise.rb, setconfig.mailer_senderto the email your app will send from. - In
config/application.rb, setconfig.action_mailer.default_url_optionsto havehost:as the domain you're app will send from. - In
app/mailers/application_mailer.rb, setdefault from:to the email your app will send from.
It's worth noting that this template does not include a solution for sending emails! Every app will have different needs, so I didn't want to be prescriptive here. If you're looking for some good options though, Postmark has been the gold standard for years now, and Resend is a shiny new startup doing cool stuff.
Postmark and Resend both have Ruby gems and decent free tiers to get you started, but really, most transactional email services will do the job.
Technical overview
To wrap up the Authentication section, here's a short, technical overview of how everything's hooked up inside this template. It's a standard Devise installation, so if you're familiar with Devise, this should all be pretty straightforward —
- gems:
Gemfile- The
Gemfilefor this template includes the coredevisegem, plus a couple of gems for OAuth (like OAuth provider gems for Google and Github).
- The
- initializer:
config/initializers/devise.rb- The Devise initializer is full of options for you to tweak, and it's worth reading through. The main change here is initializing the
google_oauth2andgithubomniauth providers, under the==> OmniAuthsection towards the end of the file. This is where you add additional OAuth providers.
- The Devise initializer is full of options for you to tweak, and it's worth reading through. The main change here is initializing the
- routes:
config/routes.rb- At the end of the
routes.rbfile, I've initialized Devise withdevise_for :users, controllers: {omniauth_callbacks: "users/omniauth_callbacks"}. This configures Devise for ourUserautomatically, but hands off control ofomniauth_callbacksto ourusers/omniauth_callbacks_controller.
- At the end of the
- controllers:
app/controllers/users/omniauth_callbacks_controller.rb- The
Users::OmniauthCallbacksControllerhandles OAuth callbacks for our different providers. There are methods here for handling thegithubandgoogle_oauth2callbacks, as well as afailuremethod to redirect a user if they fail to OAuth. - The two main methods call
login_or_create_oauth_user_for(provider), which handles signing in or creating aUserby calling thefrom_omniauthmethod on theUsermodel.
- The
- models:
app/models/user.rb- Our
Usermodel initializesdevisewith the required modules, as well as our OAuth providers —ruby devise :database_authenticatable, :registerable, :recoverable, :rememberable, :validatable, :omniauthable, omniauth_providers: %i[google_oauth2 github]Learn more by reading the Devise README document. - The
Usermodel also includes afrom_omniauthmethod — this method is called by theUsers::OmniauthCallbacksControllerwhen we're signing in with an OAuth provider. It tries to find an existingUserwith the correct details, otherwise creates a newUserwith information provided by the OAuth flow.
- Our
- views:
app/views/devise- Finally, this template includes some custom views for different Devise modules:
- The
registrations/folder includes views for logging in (registrations/new) and editing an existing account (registrations/edit). - The
sessions/folder includes a view for handling sign-ups (sessions/new). - The
passwords/folder includes views for resetting a forgotten password (passwords/new) and editing an existing password (passwords/edit). - The
shared/folder includes the default partial for displaying error messages, like if someone tries to login with the wrong password (shared/error_messages) - Finally, if you're using Starter Kit+, there's also a custom password reset email built with RailsNotes UI email components (
mailer/reset_password_instructions). - You can learn more about creating custom Devise views by reading the Devise docs — Configuring views.
[Payments] Setting up Payments
This Ruby on Rails starter kit uses the Pay gem to handle payments in your app. You can choose between Stripe and Paddle for your payment processor, and I've done most of the boring work of installing the gem and linking it to the User model, plus building ways for you to generate payment links.
What you need to do is —
- decide on your default payment processor — Stripe or Paddle (Stripe by default),
- configure webhooks so that your local development app can receive them,
- copy credentials from your payment processor into your local credentials,
- generate the correct payment links in your app,
- finally, generate a payment link and start taking payments!
If you want to jump ahead to setting up a payment processor, you can do that with these links:
Here's a quick rundown of the core pay gem setup, starting inside app/models/user.rb. In the User model, Stripe is set as the default payment processor —
class User < ApplicationRecord
  pay_customer default_payment_processor: :stripe
  ...
end
You can change the default payment processor to Paddle by changing this line to —
pay_customer default_payment_processor: :paddle_billing
I've also defined a User#billing_state method which looks like this —
# app/models/user.rb
...
def billing_state(options = {})
  if payment_processor.on_trial_or_subscribed?(**options)
    :subscribed
  else
    :unsubscribed
  end
end
This billing_state method gives you an easy, payment-provider-agnostic way to check if a User is subscribed to your app or not. You use it like this —
@user = User.first

# Only got a single plan? Check if a User is subscribed to it —
@user.billing_state # :subscribed or :unsubscribed

# Multiple plans? Check if a User is subscribed to a specific one -
@user.billing_state(name: "pro-plan", processor_plan: "annual") # :subscribed or :unsubscribed
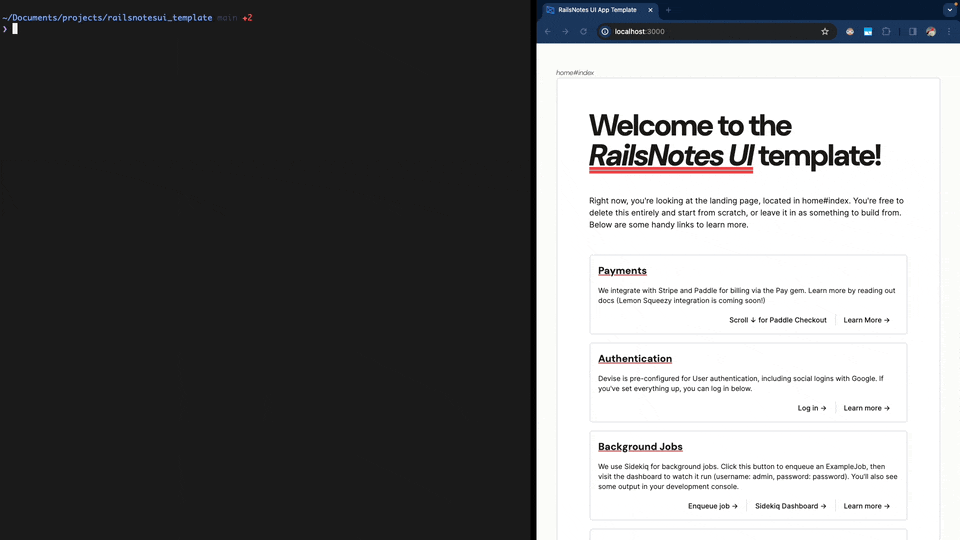
For instance, I've used this method on the template home page to render the billing state of current_user —
<p><%= current_user.name %> [<%= current_user.billing_state %>]</p>
You should read the Checking Customer Subscribed Status section of the Pay docs to learn more about the methods available on payment_processor, including —
payment_processor.subscribed?payment_processor.on_trial?payment_processor.on_trial_or_subscribed?
Managing Webhooks
This template uses webhooks to keep your app's billing information in sync with your payment processor (through the pay gem).
The pay gem automatically handles webhooks at /pay/webhooks/:provider. When you're configuring webhooks for your payment processor, use the following URLs (with your domain):
- Stripe -
https://YOUR_SITE.COM/pay/webhooks/stripe - Paddle -
https://YOUR_SITE.COM/pay/webhooks/paddle_billing
Note: I go into payment-provider-specific details for setting up webhooks.
For local development, you'll need a way to tunnel webhooks to your local machine. I use ngrok and it works pretty well; see the next section, Webhook tunnelling, for more information.
Finally, you should read the pay documentation on webhooks — Pay gem webhooks docs.
Webhook tunnelling
Note: This section is required if you're using Paddle for payments. If you're using Stripe, you'll use the Stripe CLI to tunnel webhooks instead, so you can skip this section.
To test payment flows locally, you need a way for your payment processor webhooks to get from https://some.external.url -> localhost:3000. Tons of services do this (called some variation of "tunnelling" services), such as:
I've been using ngrok and it works well. Their free product is easy to use, and it includes a free static URL, which makes local development a lot easier.
Just to be clear — you can use whichever tunnelling service you want! Any of these tools will get the job done, and if the commercial nature of ngrok isn't your style, just use something else. Just pick a service which includes a static URL — it means you won't have to continuously edit your webhooks URL on your payment processor dashboard, which gets old very quickly.
I've included an ngrok service in this template's Procfile.dev. Uncomment the line to run ngrok when you run bin/dev (handy if you're testing payments flows a lot) —
# Procfile.dev
...
redis: redis-server
sidekiq: bundle exec sidekiq
#ngrok: ngrok http --domain=YOUR-URL.ngrok-free.app 3000
# ^^^ uncomment this line
Make sure you swap out --domain=YOUR-URL.ngrok-free.app with your static ngrok url.
Note: Not using
ngrok? You can still add it to yourbin/devfile so that your tunnel starts alongside the rest of your services. Just edit thengrok:command to run your service instead.
Regardless of the tunnelling tool you choose, you'll need to add the external URL it generates to the list of allowed hosts in development.rb —
# config/environments/development.rb

Rails.application.configure do
  ...
  config.hosts << "YOUR-URL.ngrok-free.app"
  ...
end
Now that you've got a webhook tunnel setup, you're ready to move on to setting up a payment processor. The following section covers using Stripe for payments, and below that is a section covering Paddle.
Using Stripe for payments
This template uses the hosted Stripe Checkout option from the
paygem.
This section will show you how to —
- Set up Stripe for local development
- Create charges and subscriptions with Stripe
- Take payment with Stripe in production
Setting up Stripe for local development
Pay docs for Stripe: Documentation link
To setup Stripe in your Ruby on Rails app, visit the API keys section of Stripe's Dashboard. Make sure you've enabled "Test Mode", then copy your API keys into your development credentials (using bin/credentials:edit -e development) —
---
stripe:
  private_key: sk_test_.....
  public_key: pk_test_.....
Note: It's worth copying these credentials into your
testenvironment too.
Next, install the Stripe CLI. This will let you forward Stripe webhooks to your local machine, without needing to use a third-party tool like ngrok.
If you're on macOS and have homebrew installed, just run —
# Install Stripe CLI on macOS (with homebrew)
brew install stripe/stripe-cli/stripe
Then run stripe login and login to your account —
# Login to Stripe CLI
stripe login
Note: If you're on another platform (Windows, Linux etc.), visit the Stripe CLI installation docs and follow the instructions for your platform.
Once you've got the Stripe CLI installed, run the following command to start forwarding incoming webhooks to your local machine —
# Forward Stripe webhooks to localhost:3000
stripe listen --forward-to localhost:3000/pay/webhooks/stripe
Note: I've included a line in
Procfile.devfor running the Stripe CLI too. If you uncomment that line in yourProcfile.dev, when you runbin/devthe Stripe CLI will start too (handy since you won't have to run it in a separate terminal!).
You'll need to copy your webhook signing secret into your credentials file too. When you run the Stripe CLI, you'll see an output like this —
❯ stripe listen --forward-to localhost:3000/pay/webhooks/stripe

> Ready! You are using Stripe API Version [2020-08-27].
Your webhook signing secret is whsec_..... (^C to quit)
That's your signing secret. Run bin/credentials:edit -e development, and copy it like this —
stripe:
  private_key: sk_test_.....
  public_key: pk_test_.....
  signing_secret:
    - whsec_.....
With all that done, Stripe is now ready for local development, and you can move on to the next section. You can use the Stripe CLI to monitor incoming webhooks while you're developing — the logs will look something like this:
❯ stripe listen --forward-to localhost:3000/pay/webhooks/stripe
> Ready! You are using Stripe API Version [2020-08-27]. Your webhook signing secret is whsec_... (^C to quit)
2024-01-19 07:55:34   --> customer.created [evt_1Oa2...]
2024-01-19 07:55:34  <--  [200] POST http://localhost:3000/pay/webhooks/stripe [evt_1Oa2...]
2024-01-19 07:55:35   --> billing_portal.session.created [evt_1Oa2...]
2024-01-19 07:55:35  <--  [200] POST http://localhost:3000/pay/webhooks/stripe [evt_1Oa2...]
2024-01-19 07:56:52   --> billing_portal.session.created [evt_1Oa2...]
2024-01-19 07:56:52  <--  [200] POST http://localhost:3000/pay/webhooks/stripe [evt_1Oa2...]
Creating charges and subscriptions with Stripe
With the previous section complete, and Stripe set as the default_payment_processor for a User (check app/models/user.rb), login to the template and you'll see a Stripe Example Subscription → link, and a Stripe Billing Portal → link.
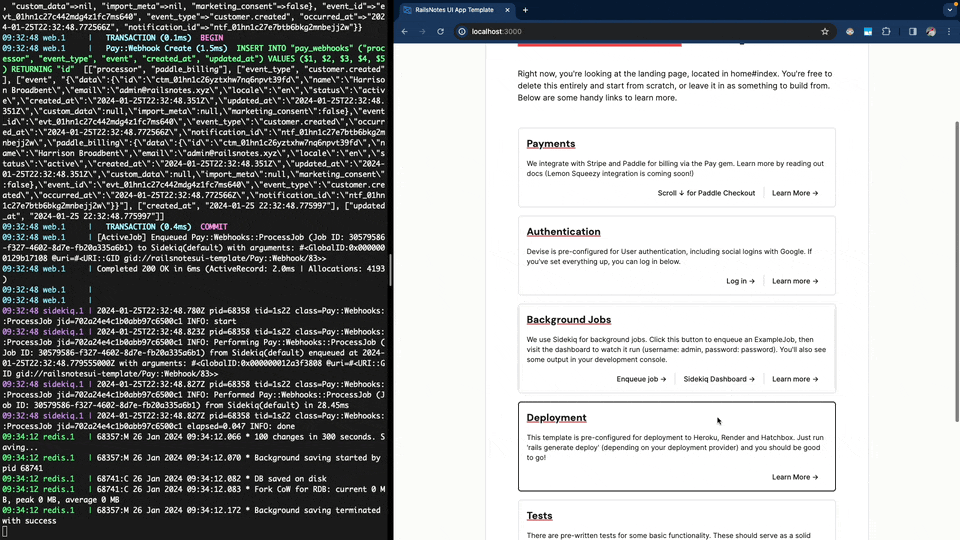
You can use the Stripe Example Subscription → button to launch a checkout session — you'll be redirected to a Stripe test checkout (use a Stripe test card), and once you've successfully checked out, the Stripe CLI will forward webhooks to the Pay gem (ie: your app). The Pay gem will process those webhooks and create Pay::Subscription record, which tracks information for a Users subscription.
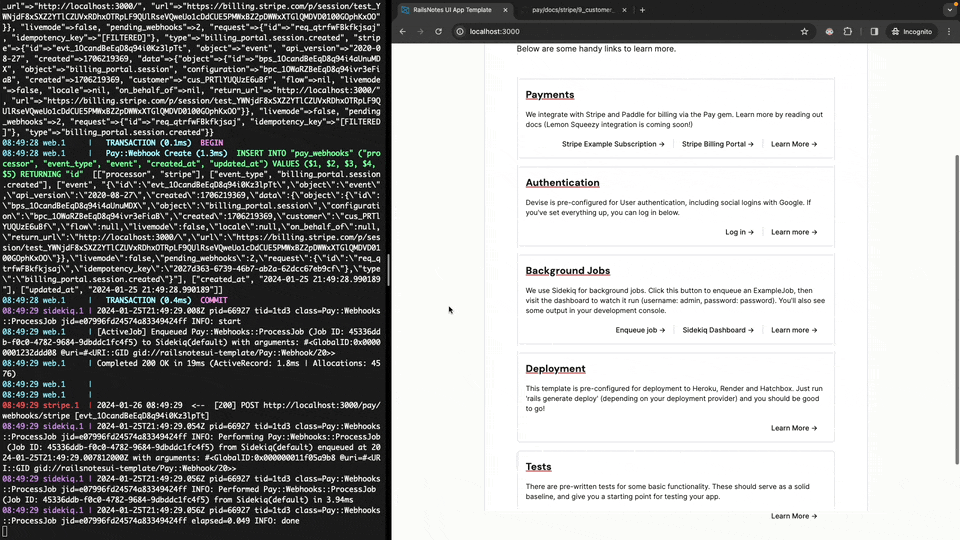
pay gem.Likewise, the Stripe Billing Portal → link will redirect a User to a Stripe-hosted billing portal, where they can manage and cancel an active subscription.
On the technical side, the URLs our User visits to create and manage their subscription are generated in HomeController (app/controllers/home_controller.rb), with this code —
checkout_session = Payments::Stripe.checkout_session(
  current_user,
  {
    mode: "subscription",
    line_items: [{
      price: "price_1OWaR5BeEqD8q94iO5fqL3vY",
      quantity: 1,
    }],
    subscription_data: {
      trial_period_days: 7,
    },
    success_url: root_url,
    cancel_url: root_url,
  }
)

@checkout_url = checkout_session&.url
@billing_portal_url = Payments::Stripe.billing_portal_session(current_user)&.url
Here, we call methods on Payments::Stripe (app/models/payments/stripe.rb), which wraps the native Pay methods. These methods return session objects, so you'll need to call .url on them to grab the URL to redirect your users too.
You pass a hash of options as the second argument to Payments::Stripe.checkout_session. The main thing is the line_items array, which contains hashes of {price: , quantity:} pairs. The value of price: is a string corresponding to a price ID from your Stripe product catalogue.
Note: I highly recommend you read more about Using Stripe Checkout with Pay in the Pay docs.
Stripe payments in production
Using Stripe to process payments in production is pretty simple — you just need to use your live Stripe credentials (instead of your "Test mode" credentials) and copy your products across to your live account.
To view your live Stripe credentials, visit Stripe Dashboard > Developers > API keys, and make sure you're in live mode, not test mode.
Open your production credentials file by running —
bin/credentials:edit -e production
Copy your production credentials into the stripe: section of your credentials file (the signing_secret is the same as the development key) —
stripe:
  private_key: sk_test_.....
  public_key: pk_test_.....
  signing_secret:
    - whsec_.....
Note: the production
signing_secret:is the same value as your development signing secret. You can copy this value from your development credentials, or find it asendpoint_secretin the Stripe events setup page.
Now, make sure the products you created in "Test mode" are available in your live Stripe account. Visit your Stripe product catalogue in test mode, click on the product you want to copy and click "Copy to live mode".
That's it! You should now be able to take live Stripe payments in production.
Using Paddle for payments
Pay docs for Paddle: Documentation link
This Ruby on Rails Starter Kit also supports using Paddle for payments (via the pay gem). Unlike Stripe, Paddle operates as a merchant of record and fully handles all your tax compliance, which is a massive help for small SaaS companies. They support a more limited set of payment scenarios than Stripe, but they can be a great choice.
The Pay gem handles setup for Paddle in a similar way to Stripe, with some small differences. Rather than redirecting to a checkout page like Stripe does, Paddle overlays a checkout over a page (see the GIF further down for an example).
This section will show you how to —
- Set up Paddle for local development
- Create charges and subscriptions with Paddle
- Take payments with Paddle in production
Setting up Paddle for local development
Before we start, I want to give you a rundown of the two Paddle environments.
Paddle has their sandbox environment for development and testing, and their production environment for taking live payments in production. You should use both environments — use the Paddle sandbox for development and testing (this includes adding your sandbox credentials to your app's development and test credentials), and use the live Paddle production environment when your app is ready to take payments from customers.
We're going to start by setting up credentials for the sandbox environment. Head over to the Paddle sandbox and create a new API key and client token under Developer Tools > Authentication.
Copy the API key and client token you generated into your Rails credentials, for your development and test environments. Edit your credentials with bin/credentials:edit -e development (or test), and copy them across —
paddle_billing:
  client_token: test_...
  api_key: 33ed...
  signing_secret:
  environment: sandbox
Next, we need to set up webhooks (this is where the signing_secret will come from, and this is how your app will get updates about the billing state of your users). You should already have a webhook tunnelling tool from the Webhook tunnelling section above (if not, go there first, then come back).
Launch your webhook tunnel (if it's not already running), and note the URL it's generated for you (ie: https://bold-labrador-integral.ngrok-free.app).
Note: I add
ngrokto myProcfile.devso that it starts automatically. I've included an example inProcfile.devif you'd like to do the same.
To set up webhooks in the Paddle sandbox, go to Developer tools > Notifications (sandbox) in the sidebar, click "+ New destination", and copy your webhook tunnel URL into the "URL" section. To the end of your webhook URL, add /pay/webhooks/paddle_billing, so that the full URL is something like:
https://bold-labrador-integral.ngrok-free.app/pay/webhooks/paddle_billing
Incoming webhooks will get routed to the correct pay controller (since the pay gem handles webhooks for us). Now you just need to fill out the rest of the fields — give this destination a simple description, and for the "Events" checkboxes, just tick "Select all events". Save your new webhooks destination, and then click on the button with three dots "[...]", and then "Edit destination".
You'll see a "Secret key" — this is your webhooks signing secret. Copy this into your Rails credentials (run bin/credentials:edit -e development) under paddle_billing.signing_secret: —
paddle_billing:
  client_token: test_...
  api_key: 33ed...
  signing_secret: pdl_ntfset_...
  environment: sandbox
That's the credentials side of the setup done!
Next, head over to Checkout > Checkout Settings (sandbox) and set a "Default payment link" for your checkout. In production, you would enter your production domain, but in the Paddle Sandbox, you can enter whatever you want (I used localhost:3000). For more info, read through the Paddle docs here: Set your default payment link (sandbox).
Finally, you need to create a product to sell. Visit Catalog > Products (sandbox) in the sidebar, and click "+ New product". Create a test product (it's just for development/testing, so call it whatever you want) and then create a price with "+ New price". Take note of the Price ID (something like pri_01..., we'll need this in the next section).
That's it! Paddle is now set up for local development, including a product with a price that we can use for testing in the next section.
Creating charges and subscriptions with Paddle
Creating charges and subscriptions with Paddle is a bit different to Stripe — with Paddle, you initialize a small javascript package on your site (called Paddle.js), and then launch a checkout overlay for your users to pay. This is in contrast to Stripe, where you generate a hosted checkout link and redirect your users to it.
Note: Once a user has subscribed to your app, their subscription is represented the same as a Stripe subscription (thanks to the Pay gem).
There are some small differences though in what you can do between payment processors, due to Paddle and Stripe working slightly differently — you should read the Pay gem documentation on subscriptions to make sure you're aware of them.
To launch a Paddle checkout session, two things need to happen — first, the Paddle.js script needs to get initialized correctly. Then, you need to generate the correct link for the overlay checkout. Fortunately, I've already set up both things for you (apart from some tiny tweaks to the overlay checkout link you need to make).
Starting with the first point, the Paddle.js script gets initialized inside the ui/head_meta_tags partial —
<head>
  ...
  <script src="https://cdn.paddle.com/paddle/v2/paddle.js"></script>
  <script type="text/javascript">
    const environment = "<%= Rails.env.production? ? "production" : "sandbox" %>"
    Paddle.Environment.set(environment);
    Paddle.Setup({
      token: "<%= Pay::PaddleBilling.client_token %>"
    });
  </script>
</head>
Note: The
ui/head_meta_tagspartial is rendered within the application layout (app/views/layouts/application.html.erb), so it's included in each view. Strictly, you only need to include this script and initialization on the pages you're going to launch a checkout session from, as per the Paddle checkout docs.
This code initializes Paddle with the correct client_token, and sets the environment correctly — sandbox when we're developing and testing our app, and production when it's deployed.
Onto the second point, generating our checkout links — these are <a> tags with a paddle_button class, and some HTML data- attributes. For detailed info, you can read the Paddle Overlay Checkout documentation, but I've created a handy partial to generate these checkout links for you, inside app/views/ui/_paddle_checkout_button.html.erb. You use the partial like this —
<%= render "ui/paddle_checkout_button",
                            text: "Paddle Checkout →",
                            theme: :none,
                            items: [{
                                priceId: "pri_YOUR_PRODUCTS_PRICE_ID",
                                quantity: 1,
                            }] %>
Note: I've included more documentation inside the partial file (
app/views/ui/_paddle_checkout_button.html.erb) which you might find useful. You can also see this partial get used inapp/views/home/index.html.erb.
The key thing in this partial is the array of items:. Each item is a hash with a priceId and quantity, where priceId should match a price from your Paddle Dashboard (you should have generated one at the end of the last section). These items are what your users will pay for.
Before you checkout with this button (we're so close now!), you need to make sure your webhook tunnel is running, so that your app will receive the correct webhooks from the Paddle sandbox after you successfully checkout. Just make sure that whatever service you set up in the Webhook tunelling section above (ie: ngrok) is running.
With everything setup, you should (finally!) be able to checkout —
You can use the Paddle Checkout → button to trigger a subscription — a Paddle overlay checkout will appear, and once you've successfully checked out, Paddle will forward webhooks to the pay gem (in your app) via your webhook tunnel (ie: ngrok). The pay gem will process those webhooks and create a matching Pay::Subscription, which will let you determine whether a User is paying for your product.
Paddle payments in production
Using Paddle for payments in your production app is relatively straightforward — you'll need to use the Production Paddle environment to generate new credentials and verify your app, set a new webhooks endpoint, and create new products and prices.
Note: Paddle also has their own Go-live checklist, which is worth reading after this section. I've included the main information you need to know, but their checklist is more in-depth (although some points might be unnecessary).
To start, visit the Production Paddle environment and either sign into your existing account or create a new one.
The first thing you should do is verify your Paddle account. This involves submitting some information to Paddle and is required before taking live payments. I recommend you do this straight away since it can take a few days to get your account fully approved.
Since verifying your Paddle account involves submitting a domain for approval, you should be able to skip setting a Default payment link (production). It's worth double-checking this page anyway and filling out that field if you can see it.
Next, create a product by visiting Catalog > Products (production), then add a new price for the product. Make sure you replace the priceIds that you pass to the ui/paddle_checkout_button in your app with your production Price IDs, since otherwise, your users won't be able to buy your products!
Note: unlike Stripe, Paddle doesn't seem to have a way to copy products between
sandboxandproductionenvironments.
You should also set up production webhooks by visiting Developer Tools > Notifications (production) and clicking "+ New destination". Give the destination a name, and tick "Select all events" to forward all webhooks to your app. The only difference is the URL — rather than a webhook tunnel, you should use your production URL, like —
https://YOUR_PRODUCTION_URL.com/pay/webhooks/paddle_billing
This will route Paddle webhooks to your production Ruby on Rails app, letting you track charges and subscriptions for your actual users. Click the button with three dots ([...]) then "Edit destination" and take note of your "Secret key", since you'll need to add this to your production Rails credentials.
Finally, you need to visit Developer Tools > Authentication and generate a new API key and client token (or you can use the default API key).
Copy these values, plus your webhooks secret from before, into your production Paddle credentials (run bin/credentials:edit -e production):
paddle_billing:
  client_token: live_8ac...
  api_key: 33ed...
  signing_secret: pdl_ntfset_01h...
  environment: production
Note: make sure
environment:is set toproduction.
That's it! Once your Paddle account gets verified, you should be able to accept production payments with Paddle.
[Deployment] Deploying your app
I've included a couple of native options for deploying this template. I've used them all, and they all do a fine job of hosting Ruby on Rails apps (although they all have tradeoffs!):
You don't have to use them though, you deploy however you want. You could have a go at deploying Rails with Dokku, deploy to a Raspberry Pi, use another cloud provider like DigitalOcean, or give Kamal a go. The choice is yours!
Deploying to Render
Render Docs: Deploying Ruby on Rails on Render
Render is a great choice for a cloud provider for your Ruby on Rails app. They've emerged as a preferred choice over Heroku, and do a great job taking on most of the DevOps burden.
This template includes a generator to create the two files you need to deploy this template to Render — a render.yaml file for specifying your app infrastructure, and a render-build.sh script to prepare your app for deployment.
Start by running the deployment generator:
rails g deploy render
      create  render.yaml
      create  render-build.sh
Copied files for Render
Then commit and push these files to GitHub (Render also supports GitLab).
Next, visit your Render Dashboard > Create a new Blueprint Instance and link Render to your GitHub/GitLab repository. You'll be shown a breakdown of the infrastructure that Render will spin up for your app, and you'll need to enter your RAILS_MASTER_KEY value (located in config/master.key). From there, you can create your resources.
That's it! Render will spin up resources from your blueprint (the render.yaml file), and after a minute or two, your app should be live.
If you're after a more in-depth guide on deploying a Ruby on Rails app to Render, I've written about it on my blog — Deploying Ruby on Rails to Render, including a database, Redis, Sidekiq and cron jobs.
Deploying to Heroku
Heroku Docs: Getting Started with Rails 7
Heroku is (or was) the prototypical deployment solution for Ruby on Rails apps. Despite its fall from grace over the last couple of years, I figured it's still popular enough to support.
For the most part, you should follow the Heroku docs directly, since they're full of handy information and examples. The only thing this template directly adds for Heroku is a basic Procfile, which you can generate by running rails g deploy heroku (you can find the generator in lib/generators/deploy/deploy_generator.rb). You'll also need to add the x86 platform to your lockfile.
Before deploying to Heroku, run these commands:
# 1. Add x86_64-linux and ruby platforms to your lockfile
bundle lock --add-platform x86_64-linux --add-platform ruby

# 2. Generate Procfile for Heroku
rails g deploy heroku
      create  Procfile
Copied files for Heroku
The Procfile just contains a basic web: and worker: process —
# Procfile

web: bundle exec puma -C config/puma.rb
worker: bundle exec sidekiq
Once you've tweaked your lockfile and generated a Procfile, follow the official Heroku docs to get your app deployed — Getting Started with Rails 7.
You might also find this article helpful for setting up Redis and Sidekiq — Setup Sidekiq for Heroku
Deploying to Hatchbox
I use Hatchbox to host this site and love it. It's simple and works well, but its killer feature is that you can run your app on your own hardware. I use an affordable, beefy VPS from Hetzner.
I pay about $15 USD/month ($10/mo for Hatchbox, $5/mo for Hetzner) to run this site on a 2vCPU/4GB RAM machine — a comparable setup on Render would cost $115/mo+, and Heroku would charge at least 2x that.
So why pay more for Render or Heroku? They both handle a lot more DevOps than Hatchbox does, but for me, it was a worthwhile tradeoff. I was happy to take on a bit more of that stuff (although Hatchbox is pretty incredible and handles most of it anyway).
There is nothing actually included in this template for deploying to Hatchbox since you configure everything within Hatchbox itself. If you're interested in learning more, I recommend you check out the Hatchbox site and watch their walkthrough video.
Note: The Hatchbox and Hetzner links I've included here are affiliate links. The Hetzner link will give you €20 in free credits, the Hatcbox link is just small a way to support RailsNotes UI (and support me!) — I use both services to host this site and love them, but you're free to use whatever hosting option you like (as long at it supports Ruby on Rails apps).
[Jobs] Background Jobs with Sidekiq
This template uses Sidekiq for background jobs. Sidekiq is the industry standard for job queues in Ruby on Rails apps.
A job queue is a core part of any production-grade web app — they're for long-running async tasks, like sending emails, data exports, or syncing with external services. Our payments engine (the pay gem) also uses background jobs to process webhooks.
This Sidekiq installation is pretty basic — it's a typical sidekiq + redis setup, plus the Sidekiq Web UI mounted to /sidekiq (more info below), and an ExampleJob in app/sidekiq/example_job.rb for testing things out.
It's worth reading Sidekiq's best practices guide to make sure you understand the basics (even if you've got a lot of experience with Ruby on Rails, it's worth a refresher!).
Sidekiq Admin Dashboard
I've mounted the Sidekiq Web UI at /sidekiq — it's a handy web dashboard to monitor your jobs. The mounting happens in config/routes.rb and looks like this —
# config/routes.rb

# first, setup dashboard authentication
require "sidekiq/web"
Sidekiq::Web.use Rack::Auth::Basic do |username, password|
  username == "admin" && password == "password"
end

# then mount it
Rails.application.routes.draw do
  mount Sidekiq::Web => "/sidekiq"
  ...
end
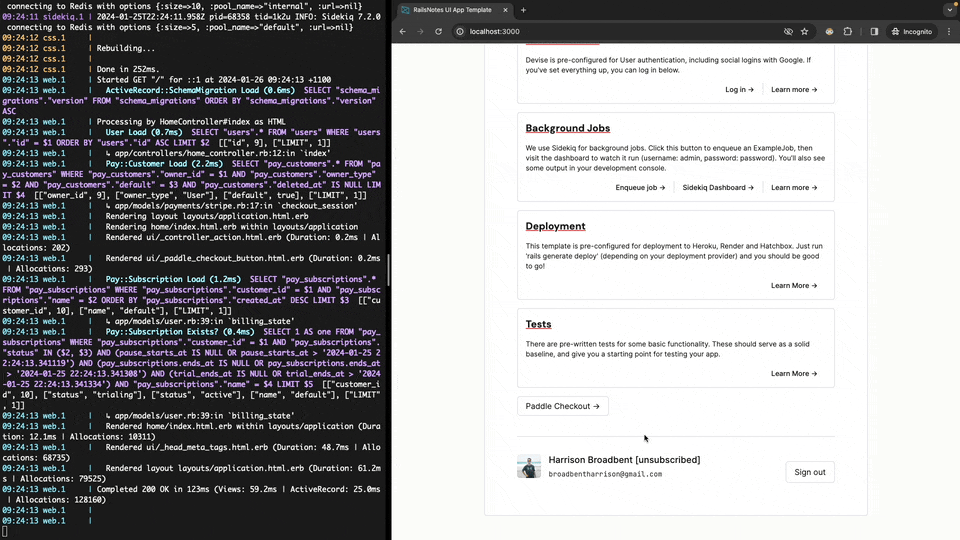
To access the dashboard, visit localhost:3000/sidekiq, or use the link on the homepage of the template. Log in using admin/password and you'll see the dashboard.
/sidekiq and login with admin and password.
Note: In the GIF above, there are a bunch of jobs in the job history. Most of them were from testing payments flows since the
paygem enqueues jobs to process webhooks.
[Tests] Testing your app
This template includes tests for both RSpec and Minitest!
I've replicated the tests between the two frameworks and they're equivalent — just pick a testing framework to use, then remove the other (instructions below).
You can choose between:
The tests aren't exhaustive — just simple integration tests to check that everything works, but they're a starting point for more specific tests of your app's business logic.
Note: Double-check that you've set up your
testcredentials correctly since otherwise, your tests might fail. In most cases, you can use the same credentials as yourdevelopmentenvironment — runbin/credentials:edit -e testand make sure they match thedevelopmentcredentials.
Testing with RSpec
If you choose RSpec as your testing framework, you should remove the Minitest tests by deleting the test/ directory —
rm -rf test/
That's it! RSpec is already configured and ready to go. I've included some basic system specs (in spec/system/basic_site_tests_spec.rb since you should be writing system specs, plus a spec for the ExampleJob in spec/jobs/example_job_spec.rb.
It's worth running the RSpec test suite to make sure your app is working correctly — run rspec from your terminal, and all your specs should run and pass. From here, you can start writing specs for your app's business logic.

rspec.
Testing with Minitest
If you choose Minitest for your testing framework, you should remove the leftover RSpec tests and files. First, remove the spec/ directory and .rspec file with —
rm -rf spec/ && rm .rspec
Then remove rspec-rails from your Gemfile —
group :development, :test do
  ...
  gem "rspec-rails", "~> x.x" # Delete this line
end
Finally, run bundle in your terminal to remove the package.
That's it! Minitest is already configured and ready to go. I've included some basic integration tests in test/integration/basic_site_test.rb, and a test for the ExampleJob in test/jobs/example_job_test.rb.
It's worth running these tests to make sure your app is working correctly — run rails test from your terminal, and all your tests should run and pass. From here, you can start writing tests for your app's business logic.
rails test.
[Extras] Handy extras
There are a couple of fun misc extras I've added to this template that I think you'll appreciate, like —
- A partial for rendering SEO tags,
- A partial for rendering the current controller action,
- The letter_opener gem for testing emails,
- Custom fonts with TailwindCSS
SEO tag partial
To help you quickly add SEO-friendly meta tags to your app, I've included a ui/head_meta_tags partial.
Inside the partial, you set default values for your meta tags (title, description etc.), and then on each page, you can define a @meta_tags hash to override those values. As a bonus, the partial also includes your stylesheets and initializes Paddle.js for Paddle payments.
I use this partial in all the Ruby on Rails apps I build — it makes it easy to set default meta tag values, then override them page-by-page (like giving each page its own title). For instance, on the home#index page of the template, I've overridden the default title and description meta tags like this —
# app/views/home/index.html.erb

@meta_tags = {
  title: "RailsNotes UI Starter Kit Index",
  description: "Home page | RailsNotes UI Ruby on Rails Starter Kit",
}
Note: If you need a more advanced meta tags solution, you might find the meta-tags gem or metamagic gem helpful.
Controller action partial
I've added a ui/controller_action partial to help you quickly figure out what page you're looking at (in development).
In each view, I've included this partial to display the controller action that's rendering the given page. The partial lives in app/views/ui/_controller_action.html.erb, and you safely remove it from your app, but I found it super handy in development. I've set it up so that, by default, it doesn't render in production.
In particular, I found it handy for editing the different Devise views, since there are a bunch of different controllers rendering different views (registrations, sessions etc).
letter_opener gem
The letter_opener gem is also included in this template, for simple email previews.
Whenever an email is sent in development, letter_opener will grab it, and open it in your browser. I've also written in-depth on Rails email previewing if you're keen for more information.
I've added the letter_opener gem to the Gemfile, and added the relevant config to config/environments/development.rb.
Custom Fonts
This template includes custom fonts (DM Sans and JetBrains Mono) to spice up the visuals a bit. It also makes it clear how to add more custom fonts.
I've included those two additional fonts inside application.tailwind.css (app/assets/stylesheets/application.tailwind.css), then initialized them inside tailwind.config.js (config/tailwind.config.js) as font-display and font-mono respectively.
Using different fonts is a fun way to spice up your UI! I recommend you dig through popular fonts on Google Fonts to find some that match your app's style.
Other misc extras
This section... is basically a shameless plug section 😅
- RailsNotes Blog — I have a Ruby on Rails blog full of articles you might find handy for building your Ruby on Rails app. From tips on writing ViewComponents to building a dynamic navbar, and even some advanced database seeding techniques, there's bound to be some helpful articles.
- RailsNotes Newsletter — I also write a weekly Ruby on Rails newsletter where I share interesting blog posts and news on different Ruby on Rails topics.
Appendix
Pulling in updates
From time to time, I'll release updates to this template — mainly smaller changes like gem version bumps, updating to a new rails version, and bug fixes. By setting up the railsnotesui remote in the app:setup script, you can easily pull these changes in.
If I publish changes to the master branch of the RailsNotes UI Starter Kit, you'll be able to merge those changes into your local template with a command like this —
# assuming you're inside your project directory (ie: my-saas/)
my-saas/ $> git fetch railsnotesui # fetch changes from the railsnotesui GitHub repository
my-saas/ $> git merge railsnotesui/master # pull latest changes into your local app
When you run git merge railsnotesui/master, git will try to merge in remote changes. This will give you access to updates that I release.
If you've been working on your template for a while, you'll probably have merge conflicts to resolve when you git merge a branch from railsnotesui.